Showing posts with label Modpodge. Show all posts

11.26.2011

Piano bench!

It's out of the garage and in the house!  This is a big deal.  I've only ever done one other big painting project, and this turned out well (although spray paint is pretty fool-proof) and it's my practice for an even bigger project that I might just have done before the new year. 

So here's the before.  I know I posted a picture of it before, but then I realized it didn't look so bad, so I went back and took some pictures of how crappy this thing was before I took care of it.

{I suppose it wasn't that bad...from a distance.}

{The glazing or whatever that the previous owner attempted was a really ugly brown.  And they definitely didn't prime before they painted, because it was chipping off like crazy in a bunch of places.}
I had originally planned to just do a light sanding and then priming and painting, but because of the paint chippiness, I ended up pretty much taking it all off.

{I got it down to its original stain or bare wood almost everywhere.  The upped left corner in this picture is white because of sunlight.}
As I took off the paint and uncovered the original stain color, I got kind of annoyed, because the original stain looked really close to what my husband had used on the piano.

An aside:  Here's why this project even happened.  For our first anniversary, my husband got me a piano (he's awesome).  Of course, cash was tight, so he was looking forever on Craigslist for a piano that worked and was in our budget.  He found one a week before our anniversary, but it was ugly.  He bought it anyway and then worked with a friend on it, stripping it down and re-staining it.  They got the whole piano done in week, but not the bench.  He was wiped out on refinishing furniture after that week, and so when he gave it to me, told me the bench was going to be my responsibility.  I was ok with that, and now after almost 4 years later and about 3.9 years after the leftover piano stain was lost, it's DONE!

Here it is now:

I did some light distressing that you can't even see in the photo, and might later go over it was a bit of stain or possibly stencil the top, but for now I have a real place to sit when I play.  It's great.

A detail I love:
I mod-podged some fabric over the bench bottom before I nailed it back on.  I love it.  Bonus tip: When mod-podging over a large area, start in a corner and move out ward a little bit at a time, smoothing like crazy.  Worked like a charm.

I hope everyone had an excellent Thanksgiving and for those of you not in the States, I hope your Thursday was totally rad.

9.18.2010

Jack o lantern string lights

Uhg, I am so bugged right now.  I'm looking for a picture of the jars that inspired me, and I cannot find it anywhere.  The one with the frankenstein and the dracula and the pumpkin and the ghost mod podged with tissue paper.  Where ever you are, blogger that did that, I tried to give you credit, I really did.

So, imagine that picture here:


And then this one:
from Amanda at the Hand Me Down House, specifically this post
And now this one:

And here's my own little hybrid idea:
Baby food jars, modpodge+food coloring, a sharpie, and a string of Christmas lights.
Ta-da!
There it is (was, I've taken it down).  I don't put up Halloween stuff until October 1st.  I haven't even gotten my fall stuff up, due to stupid pneumonia.
Here's a picture from the process I want to share:


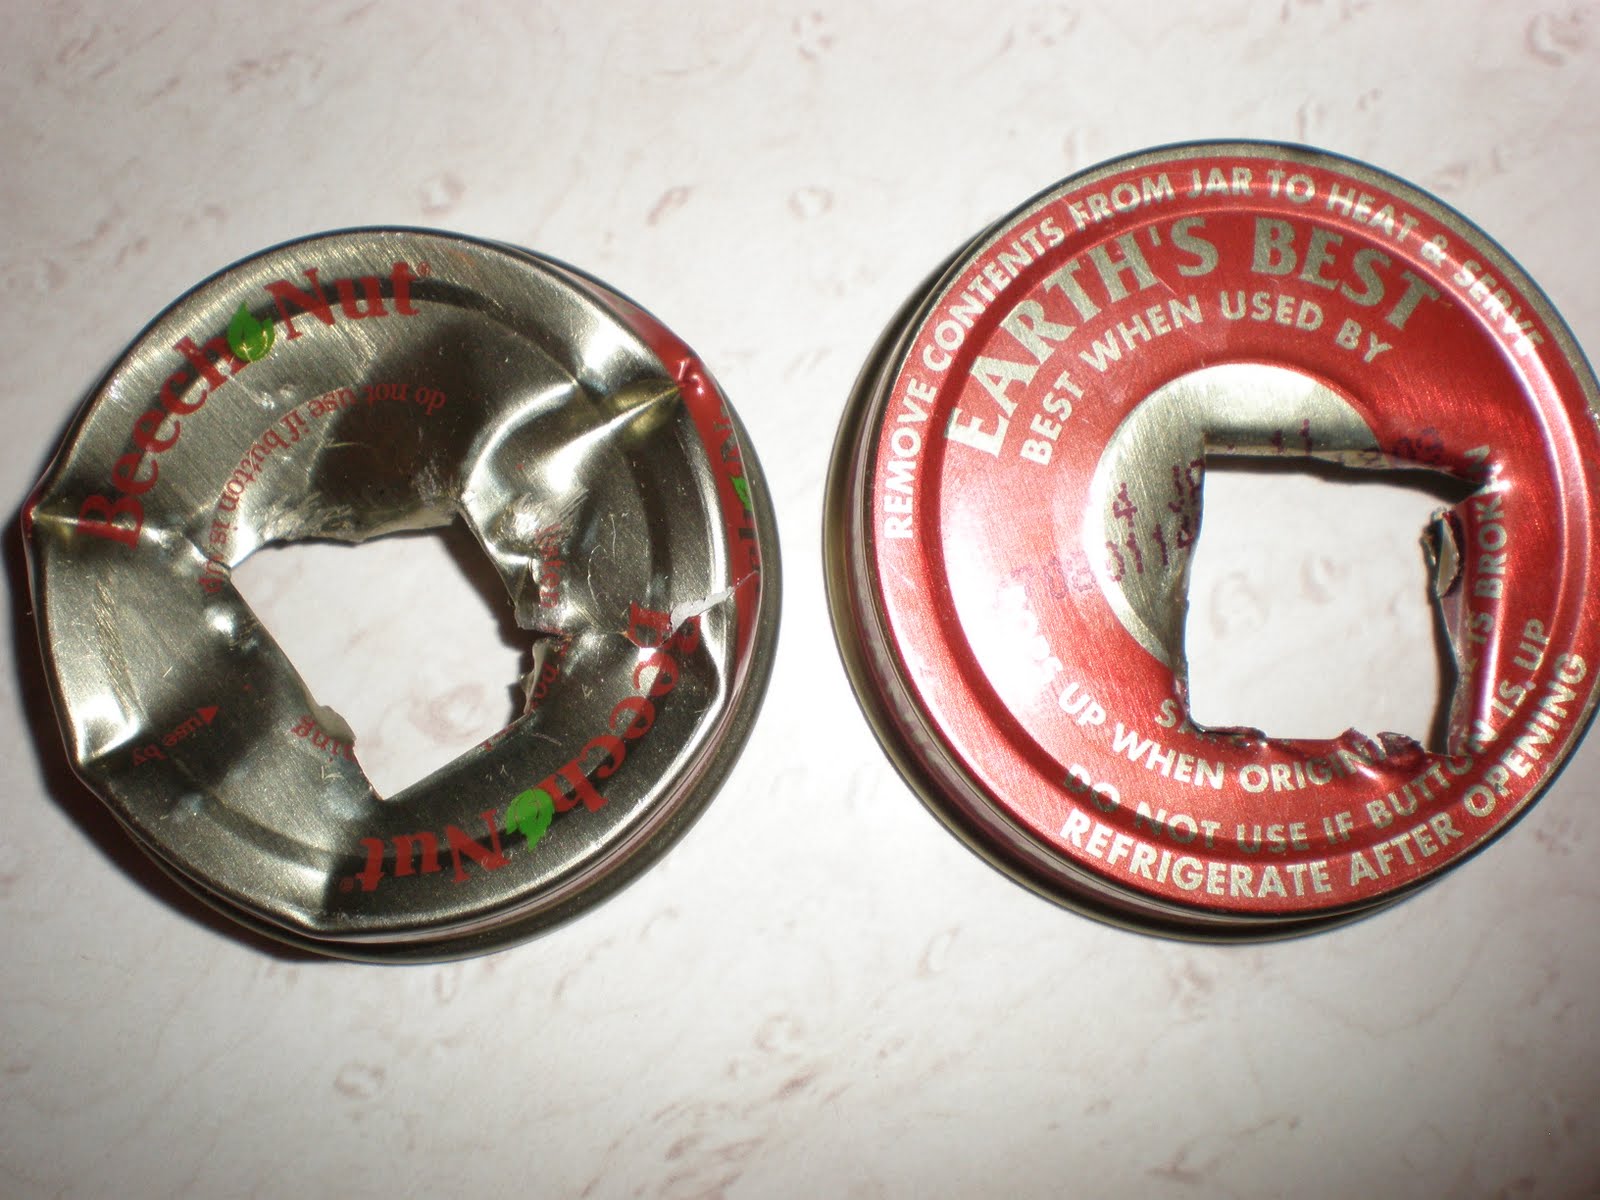
I put the holes in the lid with my rock hammer.  In retrospect, there is probably a much better way to do this.  Like with a drill.  I did improve with the rock hammer, though.  The one on the left is the first one I did (pretty sad, huh?), the one on the right looks more like the majority of them. 
I just like this picture. 


I would love to include some pictures of them with the lights on, but unfortunately the string of lights I used didn't work.  Oh, it worked when I tested it out, but after everything all set to go and I plugged it in, no dice.
And I don't have the energy to climb up into our attic loft and get down another thing of Christmas lights.
Anyway, there you have it- my take on the plastic pumpkin string lights.

**UPDATE**
Thanks to the anonymous commenter that gave me the link to the picture I described.  It was Crazy Domestic!  Of  course!  She's brilliant.  Here's the picture:
Here's the post.  I think my favorite is the mummy in the middle.  I love how the tissue strips are all wonky- you know, like the wrappings on a mummy!


3.26.2010

Putting frames around things

I've been looking for a big trunk or chest for our living room (no luck so far) and checked out several consignment shops last Saturday.  At the Mona Lisa consignment in AF, there wasn't a trunk, but there were these little wood plaques that had old seed packets mod-podged onto them.  I loved it, so I made my own (the plaques, about 2"x4", were 12$ a piece).  Here's my version:
I had the frames lying around (the one on the right was actually another little project- I painted and added the beads, like this one, sans butterflies), and the burlap, and got the seed packets at walmart for 20 cents a piece.  I also tried to age the packets a little bit, but you can't tell in the picture.  I crumpled them up and folded them a bunch and rubbed them on the burlap to make the creases look old.  I also added some dirt.

My next framing idea was inspired by something I saw at Gardner Village forever ago, and then was reminded when I saw the skeleton keys at the consignment shop (for 4-5$ each- I remember being in high school and going to Star Mill before it was all prettied up and getting a whole jar of skeleton keys for that same price).  Anyway, since I didn't want to spend that much on them, I just googled "skeleton keys" and found this place and bought a bunch there for a lot less.  I actually already owned that first big jailer's set- I got it at Tai Pan awhile ago.  So, on my bookcase I now have this:
I might paint the frame, but I don't know.  Seems like all of my frames have been painted now, so I kind of wanted to leave one natural. 


3.14.2010

Pretty garbage can: because everything in Mim's room should be cute

Nobody look too closely- I did this really fast and didn't fix several things that went wrong, because, hey, it's a garbage can.
How the garbage can problem arose:  In Mim's room, I was using a sort of medium sized, white, open top garbage.  I'm pretty sure it was just an extra that was around that I put in the baby's room.  When she was younger and going through about 10 wet diapers a day, I was great about emptying it daily.  As she's gotten older, it fills up less quickly, I get kind of lazy, and as a result, her room occasionally smells a bit like pee (poopy diapers are always taken immediately to the outside garbage; I'm not that gross).  So I plan that this new garbage will solve 2 problems- 1) it's only big enough to fit maybe 4 diapers in, thus I can't be as lazy, and 2) if I am lazy, it has a lid, which should help contain the pee smell until I can shake the laziness. 
I used acrylic paint over the plastic and then mod-podged some wrapping paper I already had on the rest of it.  And then hotglued on some buttons to hide my crooked bottom border.  I kind of want to do something to the top, but no ideas yet.  If you have one, let me know.