For everyone at my house to not be sick. To get back in the swing of things at school. For the leaves to turn. To make these for Halloween again:
{Owl cookies!}
Mike's grandma (in whose house we now live) passed away about 8 years ago, but she always made these every Halloween before that. I decided last year that it would be a tradition I would like to carry on, so those in the picture above were my first attempt. They're adorable and really yummy, too. In case anyone else wants to give them a shot, here's the recipe:
Owl Cookies:
2 1/2 C flour 1/2 tsp salt 2 tsp baking powder 3/4 C butter 1 C brown sugar 1 egg 1 tsp vanilla 1 1/2 squares unsweetened chocolate, melted and cooled 1/4 tsp baking soda
Sift together flour, salt and soda. Set aside. Cream together butter and brown sugar. Add egg and vanilla to creamed mixture and then add dry ingredients gradually. Add baking soda to melted chocolate. Remove 3/4 of the dough to a floured surface and knead in chocolate.
Roll out 1/2 remaining light dough into a 10" x 4 1/4" rectangle. Shape 1/2 chocolate dough into a roll 10" long and place it on the light dough rectangle. Roll the light dough around the chocolate dough and mold them together. Repeat with the second halves of the dark and light dough. Wrap both rolls in foil and refrigerate for 2 hours.
Remove foil, cut the dough into slices about 1/4" thick. Join two slices side by side on the cookie sheet. Place a cashew by the joint for the beak and chocolate chips in the center of the chocolate for the eyes. Bake at 350 for 8-12 minutes.
And that's it. You have to plan a little ahead, what with the chill time, but they're so worth it. Maybe later this week I'll get something new up. It's hard to say. I teach at a local university- just a few classes a week, very part time- and I'm always amazed at how much of my time it eats up. It's fun, though. Geology is awesome.
{the ones with almonds and the caramel filled ones}
{for those who prefer the classics}
and then finish is all off with some of this:
??????
A SMORE-GASBORD!!!
Oh man. Pretty good, right? I am a pun champion. Mike and I and the Mim were away this weekend with some of our friends and we put this together for dessert the night we were in charge of dinner. The possibilities were endless. I don't have any pictures of our actual set up because it was dark and our camera's just not up to a challenge like firelight, but we did have all these things. I will never go back to plain ol' smores again.
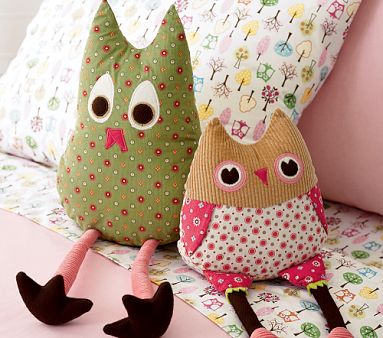
First off, let me apologize for the general photo crappiness that's coming your way- these were taken at night, with a flash. I hate the flash so much. So, I thought of something to do with one of my fat quarters that I bought for no reason! I remembered these owls from Pottery Barn Kids:
They were cuter in my memory. I don't really like that green one at all- I think it looks kind of freaky. So I poked around some more and saw some really cute ones online:
{I got the image here. It's actually from Craftsbury Kids, but they no longer carry it. }
So, I combined some elements and came up with my own:
I used a fat quarter, some felt scraps, a pair of my husband's old pants, and some embroidery floss.
I hand sewed all the bits to the bird's front using a whip stitch and a running stitch and one other stitch I don't know the name of, and then a blanket stitch around the feet. I cut strips from my husband's pants (they had an un-mendable rip) and sewed them together until I had enough to go around the circumference of the bird. Then it was mostly just about pinning like crazy. And sewing. and stuffing. And then hand sewing the hole closed. And then...
We love Halloween at my house. I've never really decorated for it (although I do have plans for it this year), and I'm not a huge fan of all the creepy/scariness, but I do love candy. And I do love dressing up. And Mike lets me dress him up (as long as it's a costume he thinks is cool). I'm super proud of our costumes from last year:
{I made Mike grow out his mustache for a of couple months.}
Mario, Princess Daisy (the yellow and orange dress wearing, brunette version of Princess Peach), and our little toadstool. The best part of our costumes is that I made them all the night before (I knew what we were going to be for months, but I procrastinated). Jokes, that's not the best part. Mim's hat is the best part. My first idea for this year was to be Mike, Sully, and Boo from Monsters Inc. When she has her hair in pigtails, Mim looks just like Boo. We would probably rent a costume for Mike, and then, if I was pregnant, my tummy was going to be Mike Kwasoski. So, since I won't be pregnant enough at that point (even if I got pregnant immediately, I would only be 2.5 months along). I just had to share my plan A though, because I think it's such a good idea. I know we could still do it, but the pregnant belly as Mike was really my favorite part. Besides Mim being so adorable. So my plan B: Princess Leia, Han Solo, and an ewok. The costumes should actually be pretty easy, I'm thinking. A huge white dress that I would cinch around the waist with a belt for me, a black vest for Mike (as well as some knee boots- that'll be the hard part to find for cheapies), and then a snow suit-style outfit for Mim made out of some faux fur. Add in some blasters made from plumbing parts and spray paint, and I think we'll be good. Except for all the little details.
{Don't worry, it didn't fall over her face, the hole wasn't big enough. It's just the angle of the camera.}
So, what do y'all think? Any better ideas out there? Anyone know where I could get a size 13 knee high boot? Is it lame that I'm thinking through our Halloween costumes already? Anybody need to know how to make a huge mushroom top hat?
I decided, after I put up the closet door, that it was time for the master bedroom at my house to get a little redo. I've wanted to change my above the bed wall art since almost immediately after I hung it. The fabric I used was another fabric store panic. Remember fabrianxiety? Is that how I spelled it last time? Well, it was happening a year ago when I bought this fabric:
I had wanted a brown and white or brown and cream damask, so don't even ask me how this happened. I think what got me is that the gray flowers (that you can't see very well in the picture) were the exactly same color as the walls, which I thought was great. But even though I don't have anything against the fabric itself, it really lacked the contrast I wanted. It looks meh. Anyway, for the past year, I've been thinking about what I really want there, and although I'm not quite there, I made some major steps in the last few days. So here you go:
{Yeah, we got married that day after Valentine's Day. It's kind of a joke that we have. Also, after I painted in the date I totally had a tiny panic attack that I had written it down wrong. I didn't...phew.}
Much brighter, much more contrast- that's what I'm talking about. I wanted vinyl lettering, originally, because I knew it would be so much neater, but my craft allowance is gone until next payday (seriously, I had to start giving myself an allowance for it because I was just going crazy) and I just wanted to go for it. Some weird stuff happened with the names, but it's kind of growing on me. What I did: I already had the stretching frames, they were 5$ each from IKEA (bless its heart). The fabric was an old sheet. And I used acrylic paint because I know nothing about painting. I'm sure there was a much better medium, but I was working with what I had. I traced a rough outline of everything and just went for it. I cut leaf shapes out of some foam and again, I just went for it. I'm pleased, but I'm not sure I'm done. Have you all seen this at Decor Chick? (Love her, by the way.) What if I did that, over the whole background or maybe just in parts? I also entertained the idea of tea staining, but I think that would dull the brightness and contrast that I love so much, like I maybe mentioned. Maybe adding some branches in something metallic? Like this, that I love so much. Hmmm. Well, more on the bedroom later, after I have craft allowance (I blew the last one on fat quarters that I don't even have a project for) again.
Seriously, are they still around? I remember my mom using one, but I haven't seen anyone whip one out recently. Or maybe I'm just missing something. Either way, they were my inspiration for this:
Mim's changing table is a big dresser/ hutch thing that my sister in law gave us (woot!) before she was born. I love it, but have been bothered by the space above the changing pad. It was just so blank, compared to the rest of the room. I used to have a women's restroom sign that hung there, but Mim kept pulling it down, which was easy, since I only used sticky tack to put it up. So, some reasons I love this:
My daughter has a ton of hair. (Seriously, check it out here.) Which means I have a ton of hair to comb and put in pigtails, etc. And she doesn't hold still. So now, I set her on the table facing her new flannel (it's actually felt) board and she pulls stuff off and sticks stuff on it and I get to do her hair.
It doubles as art.
It comes off of the changing table and she can play with it where ever (there's a velcro strip on the hutch and one on the white felt piece).
I can use it as an educational tool as she grows- numbers, colors, shapes...
It's easily adaptable. As she grows, I can add more letters and switch things up; all I need to do is cut more shapes out of felt. I could also adapt it to a boy, if that's what I have next (not pregnant; just planning on it eventually); I would just add trucks and cars and planes and other more boyish objects. Mim does love trucks and cars, though- toy and real- she makes vroom vroom sounds when she plays with them.
There you have it. So easy- just cut felt out and attach some velcro to it, then cut out felt shapes.
{The birds can face either direction, and I will add wings, because I just noticed they don't have any}
{Some of my trunk/branch combos got out of hand a little bit.}
{See?}
Oh, and sorry my last post was a bit negative. I like the chair more now, but I still think I'll change them for next year. I was just dwelling on my fabric store anxiety (or "fabrixiety") because I'm redoing another project that I need to redo because of fabrixiety (Will it catch on? Is it a thing? Only time will tell).
Remember this post? Where I found all those awesome things in my creepy shed? I was really excited about these folding chairs:
I planned on leaving them like they were, until I looked a little closer:
Some were in worse shape than others, but there was no way I was going to sit on any of them. I pushed on one with my hand and one of the bands completely ripped. So I did this:
{Don't mind the junk in the background}
I cleaned, primed, painted, cut outdoor fabric into strips, bought new screws and nuts (the old ones were all rusty), and now:
The thing is, I'm just not feeling it anymore. I wish I had chosen different fabric or a different paint color or both. That's probably why it took me so long. It was almost right after I got home from Joann's that I decided I didn't like the fabric as much as I thought I did. That always happens to me- If I don't have a very specific idea of what I want and I just get too overwhelmed at the fabric store so I pressure myself into just making a decision. Does that happen to other people? It probably didn't help that the Mimster was with me and she started to get really bored and hard to handle. I know what I want now- I wish I had gotten plain canvas. I don't know about frame color. I probably would like this blue with canvas, but how cool would copper spray paint would have looked? Or yellow. Anything would be awesome with plain canvas. And then I could do awesome, colorful outdoor pillows. Sigh. Since I've only finished this one chair, I'll probably just leave the others until next year, when I'll redo them again. I'm sure not going to invest anymore time into these when I don't absolutely love them: they're very time consuming. To give you an idea, here's the time/cost break down:
Removing the old fabric: about 45 minutes for all 4 chairs Priming: I don't know. I did 2 coats, though. Painting: Also don't know. I never finished because I ran out of spray paint and was not motivated to buy more. It took about a can per chair. Buying fabric: Not long enough. It cost about 30$ for all the fabric (50% off) Cutting it into strips: Probably close to an hour to cut for all 4 chairs. There were 14 strips per chair. I used the old brown strips I took off the chairs as patterns. Spraying the fabric with a clear coat of indoor/outdoor spray paint: I only did this for one chair. It's definitely a good step, though. It made the fabric stiff, which made it easier to work with. Zig-zagging up the sides of the strips: I never finished this, even for the chair I put together. I did it for the solid apple green strips, but not the striped strips. It wasn't worth the time. Even just doing those took over a half hour and almost an entire spool of thread. Putting it together: Like an hour per chair. The hardest part was poking a holes through the fabric.
Yikes. Too bad one of my bigger projects this summer turned out to be such a bust. Ahwell, at least I know it works, and now I know what I want them to look like. Next summer.
{A close-up of the zig zag along the edges of the strips}
{I folded the fabric into triangles on the end, which meant poking through 4 layers of fabric. I used a nail, then stuck the screw through the whole.}
There you go. A good idea gone wrong (not horribly wrong- just not as wonderful as I thought).
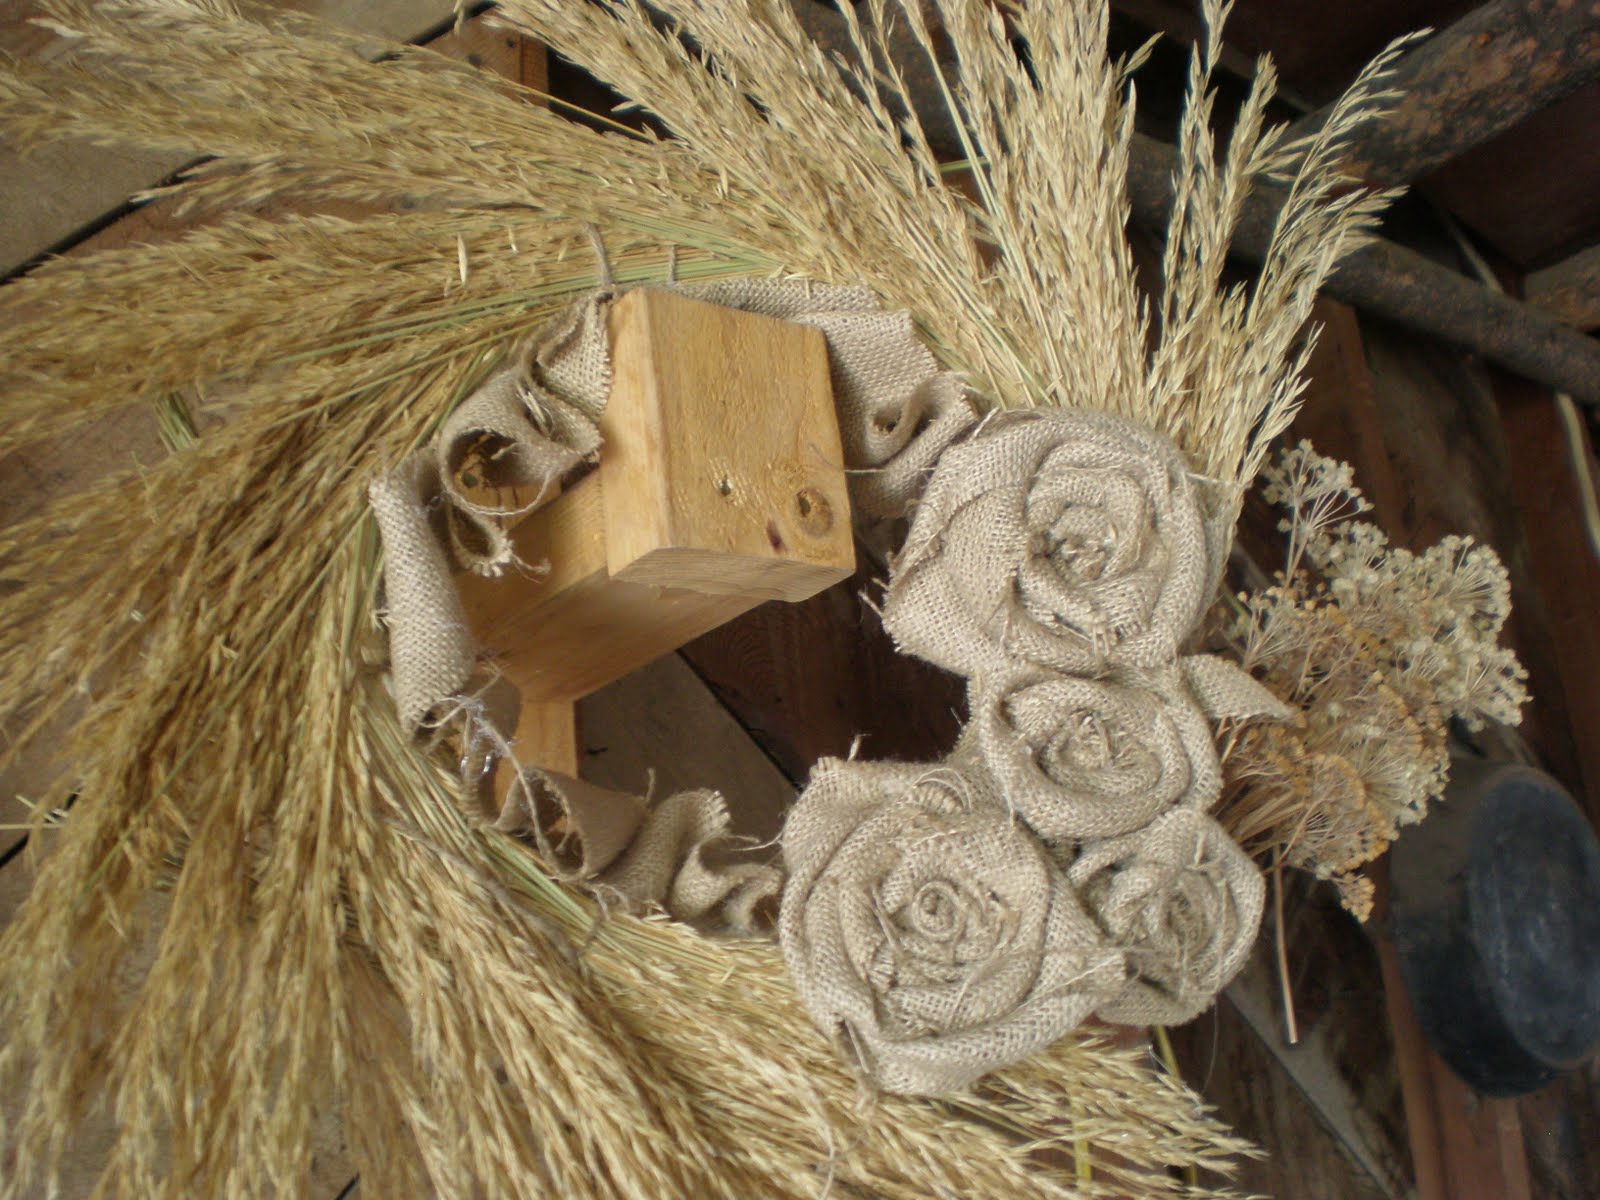
What. I know it's August. Maybe it's too soon. But I was bored and wanted to do a quick craft (instead of this one that's been sitting on my table forever that I've kind of lost steam on because I don't like it as much as I did when I started). So I made my fall wreath. I figure it can be up for September and maybe some of October, and then I will make a Halloween wreath, and then... Seriously, I have a wreath schedule. So, here's what we have for September:
There will probably be some changes before it actually goes up, but one thing won't change- it was totally free. Heck yes. I started with a straw wreath and weeds.
The straw wreath counts as free, because I've had it for awhile. You can tell, because all the plastic is shredded because of the kittens we had in the basement up until about a week ago. The weeds I got from my backyard (I actually picked them last year and never got around to this, so they've been sitting in the garage for awhile). I could make about a billion wreaths with our weed supply.
I divided out a small section and tied it on with twine.
I used twine instead of gluing things down, so I could adjust as I went. I kept wrapping the twine around and around, adding more sections of weeds and overlapping them with the section before.
Then I ran out of weeds. I did have some dried chives and yarrow (I think it was yarrow- I'm not sure because the leaves were stripped off) that I added on as the last bunch.
That's the alleged yarrow.
At this point, I sprayed it all down with this business, to hold any loose bits together. I did shake them out really well before I tied them all to the wreath- I don't want weed seeds shedding all over my front hall every time I open the door.
Since weeds all around was my original plan, I had to improvise when I ran out. I added the burlap rosettes and also rumpled a strip of burlap for around the inside to hide all the ugly that was there. For now, it's hanging in the garage, in the place where the extension cord would hang if it was put away (I don't even know where it is).
So, is there such a thing as "pushing the season" if you're not talking about Christmas?
Have you seen those vases/bottles from Ballard Design and Pottery Barn? If not, see above. Well, BD wants 60$ for the mid-size one. They're a nice beachy touch, and although I'm not into that trend in a big way, I do think it's silly that they charge so much for something that you can make for free. Here's what I used:
I had another of the vinegar jugs that I used in this post, but I've seen similar items at consignment shops. The twine was a buck at Target, and I got it forever ago, so I'm not counting it as costing anything. And I probably stole the scissors from my mom's house. To start, I tied a ring around the top, where I wanted the netting to start.
Then I cut 8 lengths of twine, each of them about 4 times the height of my jug. I tied them around the starting ring so they hung down in two equal strings. Like so:
{First I tied 4 of them at NSE and W, then tied the other 4 in between to make sure my spacing was even}
Then I started tying strings together. Adjacent strings, coming from 2 different knots above.
{This was after one round of knot tying}
{After eleven rounds- all done)
After that I pulled the threads tight across the bottom and tied them to a string across from them:
{I'm holding it in my feet}
Finished! It's all just square knots. Not bad, eh? Better than my IKEA bag version:
I think I'll redo it. Oh, and it's just square knots.

 Owl Cookies: