I cut all my pieces first. A top, a bottom, straps, waist band, and bottom ruffle. All the gingham strips are 3.5" wide. The top is about 11" by 9" (in the picture below it's folded in half). The top of the bottom is twice the width of the top section (so, 18 inches) and then widens out about 3 inches on each side. (The bottom is also folded in half in the picture below.)
First thing I did (because I just wanted to get it out of the way) was fold the waistband and shoulder straps in half (right sides together) and then turn them all.
After they're turned, I pressed them with the seam down the center in the back.
Then I did a rolled hem on bottom of the bottom ruffle strip (which was about twice the length of my bottom piece, around 48" or so).
Then I folded the top piece right sides together and sewed around the open edges, except for between the pins (about an inch and a half).
Then I turned and pressed it, making sure the raw edges were pressed under in the openings I left.
I inserted the shoulder straps into the openings, pinned, and then top stitched around the top and sides of the top piece. I was at the top of my game. (C'mon, that was solid!)
I didn't take pictures of the next bits- a rolled hem along the sides of the bottom piece and a gathering stitch around the top.
Then I was ready to attach the waistband piece (I think it was like 36" long or so- I wanted it really long so I could make a big bow in the back). I pinned it across the top, then top stitched.
Then I attached the top and bottom. I had to be a little weird about this because my machine is old and crazy and has a really hard time handling layers and ruffles all at once. If you have a good machine, you could probably simplify my last couple of steps, but you work with what you have, right?
I don't have a picture of the back, but the top part overlaps the messy ruffle bit, but isn't sewed down over it. The top is connected to the bottom because it's top stitched to the waistband.
I don't have pictures of the last few bits- doing a gathering stitch on the top of the ruffle strip, gathering it, and then attaching it to the bottom (right sides together). As for the shoulder straps, you could just tuck the ends under to finish them and then leave it and tie it onto your little one, but I went with d-rings. I won't explain it without a picture. I'm pretty sure it says how to use them on the package, anyway.
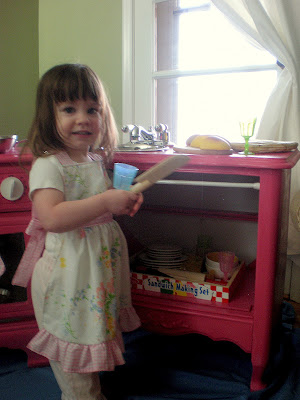
And there it is! She loves wearing it around, so I'm counting it as a success.


2 comments:
Oh, that is so sweet! It is such a cute little apron, and your daughter looks adorable in it! :)
I hope you have a good weekend!
Blessings,
Jenni
{Beautiful Nest}
Very cute! Any little girl would just love a apron so sweet! I am going to make one for my little girl, thanks for sharing.
sweetpeaandpumkins.blogspot.com
Post a Comment